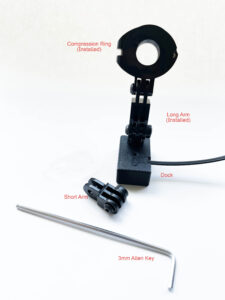
Step 1: Get familiar with the different parts of the mirror mount (the short arm is included in the accessory bag that came with your mount)
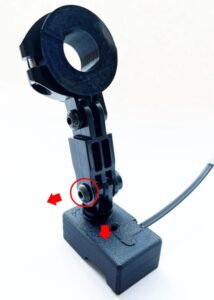
Step 2: Remove the dock from the mirror mount. Unscrew the lower screw and remove completely and then pull the dock downwards to remove it. (Save the dock and screw for use later)
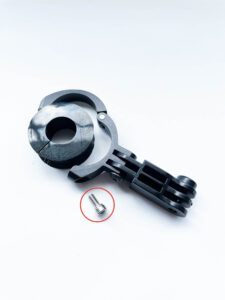
Step 3: Remove the compression ring. Unscrew the silver screw from the round clamp and remove completely. Open the clamp and remove the compression ring.
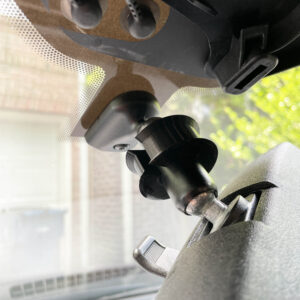
Step 4: Install the compression ring onto your mirror stem. There will be a small gap in the ring.
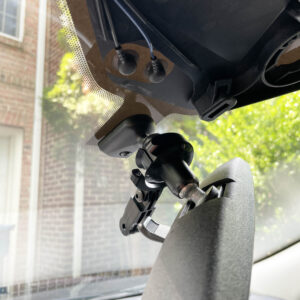
Step 5: Place the round clamp over the compression ring
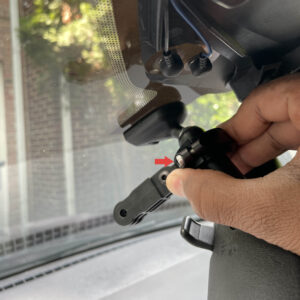
Step 6: Pinch the round clamp with your finger and get the silver screw started with the ball side of the Allen wrench. Send the screw all the way in and tighten it with the short side of the Allen wrench. (At this point the the clamp shouldn’t be able to swing left and right easily)
If you are not able to get the silver screw started change it out for a longer screw from the accessory bag. There is a 10mm and 12mm screw in the accessory bag. Start with the shorter one and then move up if you can’t get that one started. If the screw is all the way in and the ring is loose then you will need to move to a shorter screw.
If the provided compression ring does not fit your mirror stem (either too loose or too tight). Please remeasure the diameter of your mirror stem and drop us a message using the support page and we will send you another custom made ring. You can follow the guide here on how to measure your mirror stem
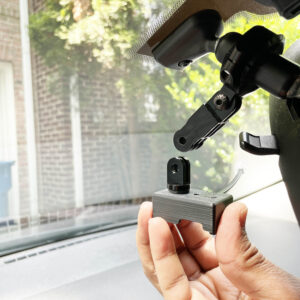
Step 7: Insert the dock back into the bottom of the arm and secure it with the screw we removed in Step 2.
(If you ordered a long cable (12ft) make sure to unroll the cable before mounting the dock and to support it as much as possible)
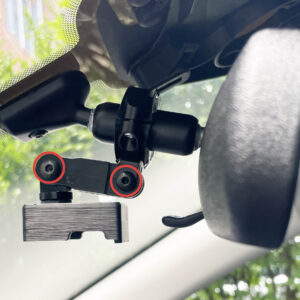
Step 8: Firm up the two screws on the arm using the ball side of the Allen wrench (don’t tighten them fully yet)
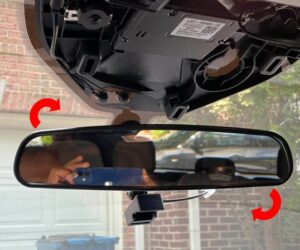
Step 9: Sit in your normal seating position and adjust your mirror to your normal driving
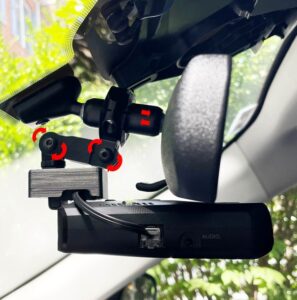
Step 10: Attach the detector to the dock and adjust the position to where you want it. All the screws should be firm here but not tight so you should be able to move things around. Try to avoid pulling and pushing from the detector but rather move the dock and the arm around instead. You can also remove the detector move things around and reattach it to check.
You can also switch to the short arm if you need shorter throw or use the long and short arm together to even have more flexibility
If you detector is not pointed directly straight don’t worry we will adjust it in the last step.
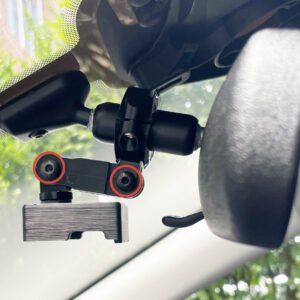
Step 11: Tighten the two arm screws using the short side of the Allen wrench. Once tight nothing be able able to move around.
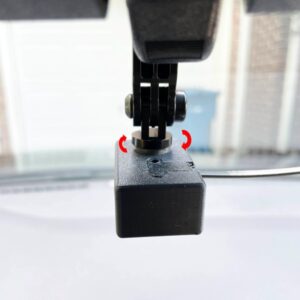
⚠ DO NOT MAKE THIS ADJUSTMENT WITH THE DETECTOR ATTACHED ⚠
Step 12: If your detector is not pointing directly forward you can adjust it by twisting the dock to the left or to the right. Hold to the dock firmly and twist it slowly (do this with the dock only not with the detector). This connection is very firm by design but it does offer adjustability if needed.
Success. Next head to Wiring